Light Minded Arts

Light Minded Arts

  • B-Roll
  • Books
  • Videos
  • About
  • Contact

Home | Archives for Lexi Adams

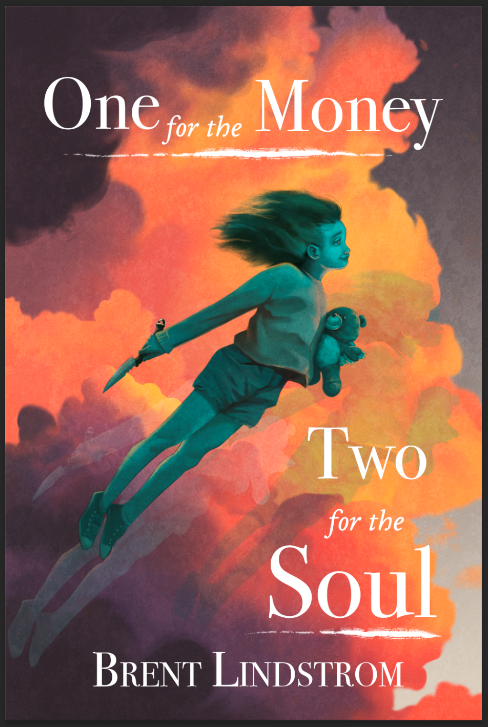
Making any short film can be daunting. In my first two articles on this topic, I talked about my Matrix spoof, and the short story that was inspired by my book: One For The Money, Two For The Soul.

Each of those had a respectable budget for a student filmmaker. The 1st had about a $1500 spend, and the latter had a whopping $15,000 spend. However, today I want to go over my very 1st short film, which had a budget closer to $150.

Buckly up, as we dissect my very first project ever, a 1 minute short film.

Never Talk To Pears, While Walking Down Stairs

student short film 1

I got the idea for this story while I was at the Timpanogos Storytelling festival. They had one day that was devoted to learning the art of verbal storytelling, which by the way, is fascinating to me. If you ever get the chance to attend something like this, do it.

One of the workshops had us brainstorming ideas. At the end of it, a few people shared their brainstorms, and then I shared mine. Mine got a lot of grumbles from the audience, mostly older folks, who apparently liked the idea of non-fiction better.

Didn’t matter. I was off to the races. Coincidentally there was also a 1-minute short film contest on a YouTube channel that I follow, called Film Riot. These two things coincided into the perfect motivation for me to do my first quazi-student film ever.

Lets start with some goals I had:

  1. Actually shoot a short film
  2. Do it cheaply
  3. Make it cinematic

Simple goals right? My goals tend to get more specific as I progress, but just filming something was a big leap forward after all my studying to this point.

Planning and Pre-Production

So I wrote down my script. It was about 3 pages long. That should’ve been a red flag from the get go, but I didn’t think too much on it at the time.

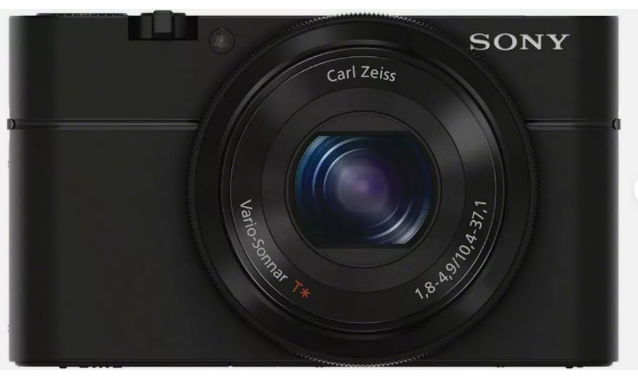
Next, I needed gear. I had no gear. I had a little Sony Cybershot RX100. It allowed for some video with manual settings. It would have to do. I had no lights, but my uncle had a couple of small lights with umbrellas from when he used to do HR interviews, and was more than happy to lend those to me for a day.

student short film

For audio, I rented a Zoom recorder with a boom mic for a day. 

Next I needed a couple actors. What do you do when you don’t have friends, film school classmates, or money? You ask family. So I recruited my mom, dad, and sister.

I needed a location, and luckily I had a model home from my construction job that looked great. Check.

Funny thing is, my mom had done some acting in a previous life, though she’d pretty well sworn it off. Thing is, she’s one of the best actors I’ve ever worked with to date, she could have probably had a good career of it if that had been something she’d wanted. She ended up being my main character.

My dad was to be the lips and voice of my talking pear.

My sister, who spent some time in theater during school, became my makeup artist, which I needed to make my mom look older than she was.

Since the model home was pre-furnished, all I needed was a few smaller props. Some I had already. I bought a larger canning jar to add to my collection of normal sized canning jars, then I printed a fake newspaper on my office printer. I got a picture of my parents and framed it on the wall, and last of all, I bought a can of aerosol mist. I was ready to shoot.
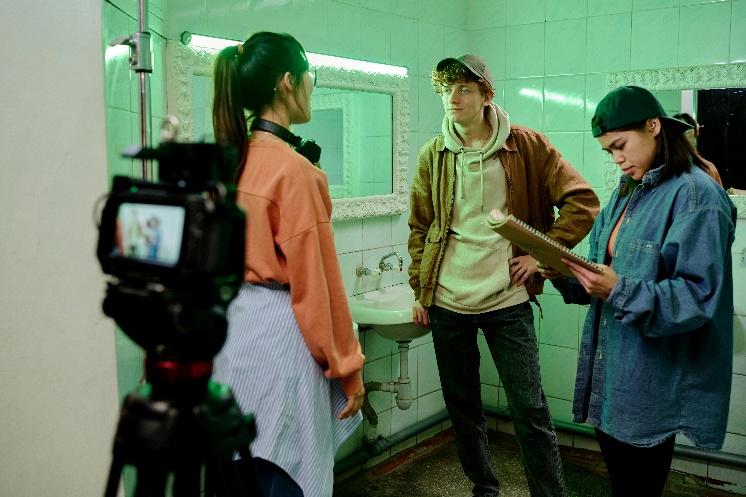
The Production

There was only one day needed for this shoot. While my sister got my mom’s makeup done, I filmed the clips that didn’t require any people. Since I didn’t have any professional sliders, I stuck a plank of wood between two ladders, and placed some books on top of the plank where my camera rested to make the camera motion a bit smoother, then I dragged the camera across the plank and got my opening and closing shots.

For a tripod, I was using my sister’s photography tripod, a clunky thing that had no fluid head, just locking pivot joints. To add in some cinematic camera movement, I grabbed one of my construction dolly’s and placed the tripod on top of that. Luckily the floor was made of hard laminate, and not tile or carpet, so after several tries, I was able to get some reasonably shake-free footage.

And what would a production be, even a simple one like this, without some kind of snag?

student short film

My little camera only had a 30 battery life. It was rechargeable battery, and I didn’t have a spare. I’m not sure, but it might have even been an internal battery, I can’t remember. I’m sure someone out there would know. It’s since gone to the grave, so I can’t check and I’m too lazy to do a google search on it right now. Never-the-less, I had a camera with no power, and no spare battery.

To deal with this, I found the charging chord, only to realize that you couldn’t charge the camera at the same time as you were shooting with it. Great. What now? Well, it turns out, that we tried charging the camera in-between takes. We’d set up, practice, then hope there was enough charge to make that take before turning the camera off again and plugging it in.

I ended up pulling out an extension cord to facilitate quicker plug-ins without having to pull the camera off the tripod.

This was a 2-location shoot. Once we finished at the model home, I took my family to my office, where we had stairs to an unfinished basement, perfect for the scene where she falls to her doom.

For this, since I didn’t really want to throw my mom down the stairs, I compiled a bunch on montage shots to make you think she was falling. Then at the bottom, rather than having her hit her head on the concrete for real, I had her jerk her head up from the floor, then I reversed the footage in post. I looked great.

Afterwords, she got pictures with my sister in her old lady makeup, which could have probably passed for zombie makeup also, and it was off to the edit for me.

The Edit

Remember how I said that I had about 3 pages of screenplay? Well, that proved to be a challenge, since I couldn’t exceed 1 minute, as per the Film Riot rules. I think though, that if I could have had one and a half minutes, the short would have played much better. But I got it cut down ok.

The 3 hardest things I encountered while editing this were, first, I couldn’t get the pictures of my mom’s body parts in those mason jars without them moving all over the place. Since my camera was moving, and I didn’t have a good way of tracking that movement, I had a super hard time of it.

Second, I was surprised to find myself in the reflection of the glass cabinet door when my mom opened and shut it. It had never crossed my mind that I might be in the reflections.

Last, I couldn’t do a whole lot to color correcting to anything. The camera I used only shot 8 bit color, and when you push the color correction to any degree, you start getting a lot of noise and artifacts showing up.

But this was a much simpler project than the two that followed it, and for a complete newbie, I learned a lot about what to expect next time. It also inspired me to get a better camera, and I fell in love with the microphone and Zoom recorder I rented.

I do remember the edit taking a lot of time still. I started this project with a month to edit it before the submission deadline, and even though it was only one minute long, I spend nights and weekends working like crazy just to meet that deadline. But meet it I did, and it did not win.

I was a little bummed that it didn’t even get an honorable mention, but I was still proud of it, because it was my first completed project, and I learned so much from it.

The Learning

student short film

How did I do on my goals:

  1. On making an actual short film
    1. Well, I made it. Goal met. You can study all you want, but at some point, even if you don’t have the gear you want, you can use the gear you have access to, and just make something. If you’re ever going to call yourself a filmmaker, you got to start somewhere.
  2. On doing it cheaply
    1. I didn’t have a choice. I was dirt poor at the time. I was pinching pennies till they warped, and I had to make due with what I could. I look back on that project though, and parts of it still hold up better today than some of the things I’ve shot with the better camera I now have.
  3. On making it cinematic
    1. The aerosol mist didn’t really do much for me during the shoot. I tried using a cookie flag that I’d made, then shining a flashlight through it. It was kind of pointless. The movement of my camera did add some good production value to the project though. I would have liked to play with the colors more, but like I said, 8-bit color space is very limiting.
  4. Other things I learned
    1. I learned to be mindful of reflections in glass and other shiny objects
    2. I learned that having the right tools for the job isn’t necessary, but it sure would be nice. For example, a fluid head tripod, with wheels would have saved time and headaches. A camera that had more than 30 minutes of battery life, and that could be hooked to external batteries would be nice. A camera that shot in at least 10-bit color space would be amazing. Even my cheap umbrella lights could do a lot.
    3. I learned that 3 pages of screenplay, really do translate into 3 minutes of footage.
    4. I learned that shooting day can be stressful. It’s not just a party with cameras and makeup.
    5. I learned that I shouldn’t ask for other people’s criticism, unless I’m prepared to get it. I had a guy I knew who did some film work, and I asked him to criticize it for me. I was expecting a critique of the filming work, and I got a critique on the story end instead. I thought the story was solid, but he pointed out good things that I didn’t like hearing at the time.
    6. I learned that I wanted to do this again soon!

In the end, this film kicked off my desire to build up an arsenal of better filming equipment. I started prepping for my next short film, which I planned to do in about a year or so from the time I finished this one, you know it now as my Matrix Spoof.

This one does however prove that you don’t have to spend a ton of money on a film project. Mine still turned out pretty decent, and at a tenth of the price of my next cheapest film. But just because you can make something cheap, doesn’t mean you always should either.

As a general contractor, I’ve learned that the tools you buy and use can make a world of difference in your work as a craftsman. It’s the same with filmmaking. Yes, I could build a house with a hand saw, but if I have an electric circular saw, I can build that house much faster and more efficiently.

That wraps it up for now. I hope you’ve enjoyed this breakdown of Never Talk To Pears, While Walking Down Stairs.

If you’d like to see my breakdown on Youtube, you can check it out here: https://youtu.be/QtKrU-8sq7I

Also, if you just want to see the 1 minute short film, Check it out here: https://www.lightmindedarts.com/

Don’t forget to like, subscribe, and comment.

Filed Under: Blog

As you may already know, I didn’t go to film school, I went to the Utah State University to major in Finance. I later went on to get my MBA.

So what does any of that have to do with making movies? Well, not much, especially since at that time, I was studying to become the next Wall Street big wig. Obviously, that didn’t happen either.

My goals evolved over time and for the last 10 years or more, I’ve been devouring everything I can find on the art of filmmaking and storytelling. One of the things every film school will have you do though, is make a student film.

So I made a few. Each time I made a short film, I picked a few key things that I wanted to learn, and I focused very heavily on those things, while perhaps ignoring some other important things. So lets dive into this short film breakdown.

One For The Money, Two For The Soul – Prologue

This short was inspired by the book release I just had this Spring, titled—wait for it: One For The Money, Two For The Soul. Yeah, big surprise, right.

how to make a student film

Okay, so in that book, I had a prologue that I had to delete. I thought it was a great little story to introduce the technology of the main meat of the book, however it was not in the same genre, and thus it didn’t mesh very well.

So out it went, but when I needed to find a good new story to practice my filming knowledge, I thought it would be the perfect stand-alone story. By the way, if you’re at all interested, please buy my book and leave a review where every you bought it from. Preferably a good review. All proceeds go to supporting me as I change careers from being a general contractor to a full-time storyteller, and trust me, that’s a scary leap when you haven’t been proven yet.

Like in my last article, I want to share with you the goals I had, how I feel they were accomplished, and other great lessons I learned while making this movie.

Goals:

  1. Learn how to better composite multiple elements
  2. Combine 3d animation with live action
  3. Do a location scout’s job (not just what I find for free)
  4. Work with professional crew and actors
  5. Be intentional on camera movement
  6. Create a color theme
  7. Get better audio

This will be another long article, so buckle up and get ready to learn with me.

Let’s Start with Pre-Production

To start, let’s talk money. After my last project, I knew what I needed to do, to lock in a budget a little better. I put together a spreadsheet, because I love spreadsheets. In my screenplay, it called for two main actors and a few side actors.

Now, I wanted to try working with some actors that had some training and were working actors. For this, I reached out to a local talent agency. I got to pick through a handful of actors on their roster and had them do an emailed audition.

The two that stood out most to me were the ones who actually memorized their lines for the audition. They were so polished and prepared, I thought, great, I’ve found my main characters.

For the side actors, I went through my Facebook group and had a couple of people send in their reels. I wanted this short to have a serious but not too serious vibe, and so I hired one guy who had some of the best facial expressions that I thought I could play with. I don’t remember why I hired my nurse actress, but I do remember having several options to choose from, and she was the one I ended up casting.

Let’s not forget my child actor. His mom joined him on set every day, and they were very ambitious about turning him into a professional actor. I should look him up someday and see where he ended up.

There were a couple extra roles that I needed to fill, but they were very minor, and I thought I could do them and challenge myself to be in front of the camera for a change. This would be the guard, and the camera operator at the end. Plus, I was a lot cheaper, and I was very conscious about my budget.

In the end, I had 3 actors for the 1st day of shooting, 4 actors for the 2nd day, 2 actors for the 3rd day, and 1 actor for the 4th day. That totaled: 11 actor days of filming, not including the extra day I used to film myself. I believe the dollar amount came in at roughly $3250.

how to make a student film

Already I could see that this was going to be expensive. For my crew, had to make some compromises to my goal. I couldn’t afford a pro sound guy, so I decided to be my own, and just work harder at getting it good. I did hire a professional gaffer though. For the rest of my crew, I was able to get some BYU film students, and they were awesome. They knew just how to work on a film set, more so than me, and they all came eager to practice the things they’d been learning as well. If I had my actual film studio up and running and needed help, I would have hired them in a heartbeat.

On this shoot, I hired a hair and makeup artist, who was super. She was there on set with us, touching up makeup before the takes, and just making sure our actors looked amazing.

For my total crew budget, I was looking at spending another, oh about $3800.

I did save a little money by not bringing in my gaffer on the 1st day of shooting, nor did I bring in my agency actors that 1st day, rather I chose to lump their scenes together with the 2nd day’s shoot, since I figured I’d have enough time to get that done then.

For my locations, I needed an indoor commercial pool. I called multiple hotels, and nobody wanted to work with me. At this time, Covid was just starting to sweep the nation, and hotels were shutting down, so I thought it would be easy to convince them to let me in, since it would give them at least some revenue for a day.

In the end, I had to reach out to the Utah Film Commission, a group I’d only ever heard of, but never actually worked with. They were amazing. They found me a hotel that was willing to let me shoot for a day. It was crazy, they had a front desk guy there the whole day, and we were the only other people in the hotel, right in downtown Salt Lake. I paid $500 for that location.

For the outdoor scenes, I found a city park, and filled out the required permits. I don’t remember if they even charged me for it. If they did, it was probably something small, like $25.

Then I found a school and over several emails and site visits, I was able to work with the principle and get permission to shoot there for a day for another $500.

My last location was free, because I did it in my office. All in all, my locations cost pretty close to $1000.

Next was props. I’m pretty scrappy when it comes to props and costumes, however I couldn’t find everything I needed at the second-hand thrift store for this shoot. Most of what I ended up with was sourced through eBay and other online retailers. A couple of the expenses were things I’d wanted anyway, like a wheelchair. What indie filmmaker doesn’t have a wheelchair?

I also needed a hospital gurney. That was a bit trickier, and more expensive, but I found one that wasn’t too bad, and the coloring was close to what I wanted for my overall look.

Some of the outfits were second hand, some weren’t, but when you’re going for a specific color scheme, it gets tougher to find cheap. Other props were kit bashed together and cost practically nothing.

I think after all my props and costuming was purchased, I had spent about $1600.

I now had everything I needed. I had my actors, locations, dates, props and costumes, and I was committed to spending a grand total of: $9650. Assuming I’d estimated wrong, I added in a little fluff and rounded it to $10k.

This would be the most expensive project I’d ever done, and I knew immediately that I’d never make that money back, so I better make the best of this.

Production Day(s)

Day 1:

Since this wasn’t my first rodeo, you’d think I’d be a little calmer, but no, that first day of shooting was as nerve racking as ever. Again, I got little to no sleep the night before, and felt completely nauseous the whole morning, up until it was time to shoot.

how to make a student film

All my crew and cast showed up like clockwork. We got set up and got ready to shoot. This was the one location I didn’t scout beforehand, because of Covid, I couldn’t get in to see the place, but also, it was the only place willing to let me shoot their indoor pool, so I didn’t have a choice. It was here, or nowhere.

So I came without a storyboard, and planned to composite my main actors in later. We measured everything, took notes on angles, lenses, and tried our best to imagine where our main characters would be and we did our best.

This turned out to be complete chaos, and everyone I’m sure was wondering if I knew what I was doing, including me. Oh, and I forgot to bring a memory card for my camera, so we were delayed from starting an hour while we waited for that to show up. Thanks to my brother, I didn’t have to drive 45 minutes back to my office to grab it, he just brought it up to me. Whew, one crisis averted.

The rest of the day went very well. We got plenty of coverage, and by the end of the day, I was feeling pretty good. The pool did have one wall that was covered in glass and created a little problem for my scene, but I felt like it was something I could manage in post. So all in all, the set wasn’t perfect, but it was close enough to my vision that I felt it would work.

Day 2

This was the big day, the marathon day. I told everyone to plan for about 12 hours. Even then, the talent agency I used called and complained to me about the hours. I thought I’d made the conditions clear to them, but they wanted more money. In the end, I didn’t have to pay out anything additional.

Anyhow, we started off really good. This was filmed in a local school, which had the perfect look and while the coloring was a little off, it was close enough. Then came the 1st major snag of the shoot. My child actor’s mom told me that she had double booked her son, and that they had to catch a flight to Hawaii soon and that they couldn’t stay much past noon.

I don’t blame them for taking that other job. It was better pay than I could give, plus a trip to Hawaii, I think had I been in their position, I would have wanted to take it also. Plus, she did give me ample warning that day, so I could at least try and make things work.

That meant that while everyone was taking lunch, I was combing through the shotlist, scrambling to figure out how to finish shooting everything I needed with that boy in the next hour.

The next two hours became a tornado of improvising and cutting shots out and run and gun filming to get his footage in the can. During this time, we also had a location change, which was really just the park behind the school, however, half of my actors got lost on the way there and we lost another ½ hour of shooting trying to track everyone down.

When finally I felt I had everything I needed from him, they raced off to the airport, and I worked with my remaining actors to get the remaining footage we needed from them.

One of the problems I also faced, was that I had some steady cam shots. I’d bought a cheap steady cam rig online, but it was made for a much fatter man than me, and I couldn’t size it down. So I had to wear a thick winter coat to make the thing fit on me, and that was during 90-degree weather.

By the end of the day, after we called it good, everyone was exhausted. We sat on the curb, trying to cool down in between packing trucks up.

I had actually brought 2 trailers with me. One for my gear, and another small camper for actors to get dressed in. I took the 1st one home, then worshiped my porcelain god as I vomited from heat exhaustion for the next 3 hours. Then I went back and picked up the other trailer. Got that home, and dreaded tomorrows shoot.

Day 3

By morning, I was feeling a lot better. I don’t know that I slept any better than the night before, but my heat exhaustion had mostly passed, and I was as ready as I could be for the day.

I drove to my office where I had the basement set up with a large green screen, and I had turned my actual office into one of the sets.

Everything here went very well, though I think my star actors were a little frustrated with me, because they kept asking for help on their acting, wanting to know what I needed from them. My answer was the same. I didn’t care. I wanted them to play their parts as best they saw fit, and for my female lead, I only tried to direct her as far as letting her know where she was and what she was doing during her greenscreen moments.

If you’ll notice, in my goals, I only mentioned that I wanted to work with trained actors on this film, but knowing how to direct them was not one of my goals. I had read books on it, but at the time, I hadn’t taken any acting classes, and I hadn’t acted myself, so I didn’t know what I didn’t know as far as how to direct them.

All in all, this day went much smoother than the previous day. However it wasn’t without its problems too. First major problem, was that we lost power to our building for a couple of hours. Luckily, a lot of our equipment could run off batteries, however the office building was equipped with battery backups for some of the computers, and when they activate, they start chirping, which was impossible to film around because we couldn’t get clean audio.

Eventually we got through that, though it added a couple hours to our shooting day. And then came the next setback.

My last actor, who was supposed to be there by now, still wasn’t. When I finally got ahold of her on the phone, she told me that she’d decided to back out, and would not be joining our film.

As soon as my crew found out, one of my PA’s, a BYU student said that she’d been studying acting and would love to give it a shot. So I said great. I gave her the lines, she went home to find some clothing that matched the scene, and we agreed to meet up the next morning to film her character.

I paid everyone else, and said good luck, give me a year to edit this.

Day 4

That 

That PA, now turned actor, showed up the next morning with my makeup artist, which I now needed to pay a little extra for the extra day’s work. We got her part all filmed just us three, and I paid them both, then we were done.

I still had a few shots to film myself in, which I did after everyone was gone. They were all greenscreen and static shots, so I was able to handle it without much trouble, though I realized that I was a bad actor, and should probably invest in some acting classes at some point.

Finally, everything was in the can. I was ready to start editing.

The Neverending (Post Production) Story

When I did my Matrix spoof, I learned that it took me about 4 hours to edit every 1 second of finished footage. Then again, I was learning Adobe After Effects and Blender, and I had a terrible computer for the job.

This time around, I had a beast of a computer that I had made. It had two high end graphics cards, the best processor I could get, and I had already learned so much more within those two programs that I felt confident that I could cut that time in half.

I was wrong.

While I had learned a lot more about greenscreens, and I had a pro gaffer helping me light them, the footage proved to still be a major headache to get keyed out to my satisfaction. Even now when you watch the short, you’ll probably find some bad coloring where I had to push things a bit too far to get my keys to work out. Even then, I had a lot of masking still to do. Green screens I’ve learned, aren’t the end all be all of visual effects. They take a lot of time and craftsmanship to get right.

On top of that, my ambitions to build a world that was both 3d animation and live action, meant that my Blender models and rendering had to be top notch. Most of this worked out ok, though render times in Blender for the quality I was going for still took a long time.

In the end, I found myself still having to make a few compromises on the 3d animation. For example, when she’s driving in the car, you’ll notice that the light and shadows that play against her are in straight lines. This is because she is a 2d image inside a 3d animation. The shadows don’t actually wrap around her like they would in real life.

I did love working on this new computer though. I could actually composite in a non-destructive work flow. Which was nice, because I think every single frame of this movie has between 2-6 different layers of compositing meshed together. The entire movie is a big vfx project. 

So even though my skills in this department were improving, the degree of complexity I threw at this project still made it take about 4 hours of editing for every 1 second of finished video.

how to make a student film

Things that were difficult in the edit included: the opening sequence. Parts of my Blender animation worked out good, parts didn’t. So that’s why it’s so choppy at first. Also, I struggled figuring out a good way to show the text conversation between our scientist and his sister. Text conversations can be so tricky, at least for me. Keying out the greenscreens was still perhaps my biggest bane, though I did have a problem with some reflections that I had to deal with on the glass doors.

For audio, I used a subscription that I’ve had for some time called Filmstro. They’re app is super clunky, but they have a bunch of great music that can be customized.

When it was all done, I felt the same way I did upon finishing my Matrix spoof. I felt there was more I could probably do to improve it, but it was to the point where I had to give up and move on. It still turned out ok, but I wasn’t surprised when it failed to get accepted to any film festivals.

Afterthoughts

This was a super ambitious project. Not only because we had a 15-minute movie, most of which was shot in 2 days, but because it had so much vfx included. I am proud of how it turned out, though the problems always stand out to me like a sore thumb. I wonder if anyone else notices them as badly as I do.

So let’s review how I did on my learning goals.

  1. On learning compositing:
    1. I did a fair amount of this in my matrix spoof, but really elevated the complexity and expectations here. There’s a few issues here and there, but for the most part, I think I did a good job, and I learned a lot that can help me in future shoots.
    2. One of the things I did here, to aid in pulling my chroma keys and in masking that I knew was going to be a thing, was I filmed this whole video with a 90 degree shutter angle. Basically twice the shutter speed as normal, so that I could get crisper images, which hurt motion blur, but aided in masking. I don’t regret that decision, though it wouldn’t be right for every project.
  2. On combining 3d animation with live action:
    1. This part was fun. Most of it wasn’t a big deal, aside from render times, which at one point, I had my awesome computer chugging away for over a month on renders, only to realize I needed to redo some spots and start the render all over again.
    2. As I mentioned earlier, I discovered that 3d shadows on a 2d image don’t work right. When my character is driving her 3d animated car through a 3d animated scene, the light coming in from the windows does not fall naturally on her. Next time, I would turn off the light interactions with her, and film those practically on her during the actual shooting day—which we did to some degree, but not nearly as much as we were expecting to need.
    3. Sometimes matching a 3d animated object to a real object can be tricky. I ran into this with the car, when she steps out of it. I had to use a real car, then color change it to match the 3d version I’d created in my computer, and they don’t match perfectly,
  3. On doing a location scout’s job:
    1. I was a bit nervous at first. Tracking down locations, then getting permissions was a slightly tedious project. I didn’t know if the people and institutions I talked to would be accommodating, and some weren’t. I also didn’t know how much I’d have to spend to get some of them. In the end though, it turned out very well, and I was pleasantly surprised with how smooth everything went, minus the near miss on finding an indoor hotel pool.
  4. On working with professional cast and crew:
    1. I learned a lot from my gaffer. He was such a pro. I wish I had the budget at the time to hire a pro sound guy and a pro DP, but my budget was already getting unreasonably high. Mostly I loved how he had the tools to not only rig a set fast, but he had spare parts that came in real hand for my camera rig that made things so much easier. He was hard working and knew how to shape light better than I could have. I loved seeing how he set lighting up and I feel that even though we had a very neutral lighting setup, in order to match some of what we filmed in the pool, that it turned out great, and informative.
    2. Working with professional cast was a delight also. They were less concerned about how they appeared to everyone else, and more focused on playing their parts to the best of their abilities. I wish at the time that I had taken acting classes so that I would have better known how to direct and work with them. That is one thing I would suggest to any wanna-be director. Take acting classes. Put yourself in their shoes for a little while. It will help you be a much better director in the long run.
  5. On being intentional with camera movement:
    1. For a lot of our composite scenes, having a locked off camera was essential. However, there was some camera movement that I planned in there, and I felt like it gave the picture a sense of motivation that I didn’t have in my last short.
    2. The one caution I can give though, is if you are going to do some vfx on a moving camera, be very intentional about how you plan to edit it together. It adds a lot more difficulty to the edit.
  6. On creating a color theme
    1. I feel like I did a really good job on this. I wanted this to be a futuristic looking world, but one where the styles and trends had circled back around to the era of avocados and yellows, with fun curvy cars. Not only did I want the color to give a nostalgic future vibe, but I also wanted it to give you permission to laugh. So I wanted a little vibrance to the world.
    2. There were a few things that threatened my color scheme. One was the School where I shot the standard interiors and doorway scenes. The brick was perfect, but the tile left a little to be desired. In the end, I added a few elements to mask the school mascots, and did a minor color correction on the tiles, and though it wasn’t perfect, I felt like it looked ok.
  7. On getting better audio:
    1. This time around, I had extra microphones. I still used my boom pole microphone, but I also used lavalier microphones on my main actors, so that I could have a backup audio track, and have something that just caught their voices rather than everything around them. Plus, a boom pole wasn’t always able to get in close enough for my liking. 
    2. All of this audio was recorded on separate tracks, and in one instance, where a key mic should have caught the dialog, it turns out we forgot to turn that microphone on, and we got saved by our backup, even if the quality of that backup wasn’t as good, we still got it.
    3. For my locations where I knew echoes would be an issue, I invested in sound blankets and reduced the reverb considerably. In fact, I think I added some reverb back in during post, because I felt that and indoor pool area would sound wrong without a little.
  8. Other things I learned aside from those focused around my goals
    1. I learned that compressing several pages of script into a single day might save money, but it might ruin your project. You never know when one of those little setbacks is going to occur, or how it might happen, but issues happen, and when you’ve already planned out every second of every shooting day, a minor problem can turn into a huge issue. So give yourself the time to get things right, even if something unexpected happens. 
    2. Fifteen minutes of something like this was so close to being a half hour high budget sitcom. For Hollywood to produce the same thing, They would have spent over a million dollars. I guess there’s two key take aways in that thought. One is that as an independent, we can make a dollar stretch a lot further. On the other hand, consider how many hours I spent editing this. I probably put about 3000 hours of free labor into the edit alone. It took close to 2 years to finish this when all I could do were nights and weekends.
    3. Be consistent with your payroll practices. This was a goof on my part. I had a little extra cash, and I worked my crew to the bones, so when it came time to pay them, I felt like tipping them above what I had agreed to pay them. However, since one of my crew also did some acting for me the next day, I held off paying her with her crew. Then when it came time to pay her, I gave her the money plus the generous tip I’d given the others. The only problem was, she had come in for an extra few hours that next day, and my mind was so stretched from the stress of the last few days, that it didn’t even cross my mind to pay her for the acting job she did. She never mentioned it, and we all parted on good terms. But some time later, as I was reflecting on everything, I realized my blunder. I ended up reaching out to her and sending her some extra money, though it was embarrassingly late in coming. I felt pretty bad about that. You should always take good care of those who help bring your vision to life.
    4. Be careful about catering. I thought I had my bases covered. When I hired everyone, I asked about any food allergies or preferences. All told me they were good with anything. I didn’t want to do just a cheap greasy pizza, so I ordered in some nice food for lunches, however the food still got one of my crew members sick, not because it was bad, but because they had an intolerance to the food choice I picked. I’m not sure what to do differently next time, but I’m sure that if I hired a crafts service crew member, I’d learn better how to feed my cast and crew.
    5. I learned a little about pacing and dialog too. Some of the dialog I wrote came across as cheesy, and some was just too much, the pacing was off. I ended cutting a lot of it in the edit. I’ve often heard that American movies have too much talking, and I’ve tried to limit that in my writing, but I’ve realized that I still do far too much telling and not enough showing. The only problem was, to show what I needed, I would’ve doubled the length of my film. So learning how to write more concise and make every word and image count is something that I need to consider going forward. Every frame should be a masterpiece of composition and storytelling when finished.
how to make a student film

Well folks, I told you this would be a long article. Sheesh, it’s almost a novella. But I hope you learned something from my experience. I do hesitate in calling this a student film though, only because of the budget I ended up with. When you consider that I had to add a little to my gear to make this happen, my $10k budget probably grew to $15k.

There’s a reason I haven’t been able to produce a short film like this every month, it’s because it takes a year to save enough money to afford something like this. But that also is one of the reasons I didn’t mind learning how to do so much with the 3d animation and compositing. It gave me plenty of time to save up between projects so that when I finally finish this, I’d be in a position to start another.

So what will that next project be? Well, I think I’m going to do a lot of very short shorts next, stuff that I can quickly turn around and post on Youtube, along with some helpful info on my journey from being a homebuilder to being a writer producer.

If you’d like to see my YouTube breakdown of this short, check it out here on YouTube: https://youtu.be/gvqREZSWt5k

Don’t forget to also check out the actual short film here: https://youtu.be/mj4XN0OvtYc

Then like, comment, subscribe, and all that fun stuff so you can see what new stuff I end up posting.

Also if you’d like to support me in this journey, don’t forget to buy the book that this short was inspired by. It would really help me out especially if you could leave a positive review from whatever online book retailer you buy it from.

Thanks, and until next time, keep learning and following your dreams.

Filed Under: Blog

What if human trafficking took a turn for the ridiculous?

There aren’t too many authors having fun with this topic? Maybe there are, but they’re all a bit too serious.

Want a good book that you can laugh along with, and share with your whole family, then pick up your copy of One For The Money, Two For The Soul, by Brent Lindstrom. 

Why? Because you’re going to love it.

New Spring of 2025

Ok, so I just released this book in March. The print and e-book are available most any place that books can be bought. There’s also an audiobook coming soon to retailers online, however, we’re still working out the bugs in that release. For some reason, technology is failing me there. But keep an eye out for it. It should also be available in all the usual places soon.

Does This Sound Like A Book You’d Enjoy?

This book is being marketed to adults, however, it is totally appropriate for young teens as well. The only reason I didn’t publish this under their genre, is because I want all ages to have the permission to enjoy this story.

The story follows the adventures of a young girl, as nefarious human traffickers steal her spirit, rather than her whole body. And to be frank, they’re not that good at their job, and are only able to capture about half of her spirit. They messed up.

Why would they want her spirit, anyways?

Turns out that in the near future, if you want to clone somebody, and not start them out as a baby, you can create an age appropriate shell of a body. However, these pre-aged clones can’t work right, because they don’t have a spirit.

Enter our bad guys. They’ve learned how to steal normal people’s spirits and transplant them into these lifeless shells, creating a living souled human.

Follow Winnie and company on this zany adventure, as they navigate the improbable consequences of this situation.

My Inspiration for Writing a Book Like This

Welcome to the deep numbing cerebral vortex of my mind. This book has been a passion project of mine for the last several years. Back when I’d done some of my earlier drafts, I hired David Farland, bestselling author of the Runelords series to help me edit this book. 

Since then, it’s been through several more drafts and more editors, and I’m happy to present it as my very first book that I feel deserves to be published under my actual name.

It’s been a long journey getting to this point. If you’ve followed me at all on my storytelling journey, you might know that I’ve published a handful of books under the pen name of BC Crow. I consider those my “Trunk” novels, or in other words, my practice books. They’re a bit campy, some have terrible flaws, but this is my first book that I feel turned out the way an accomplished author’s book should read like.

One of the fun side stories in this book was a prologue that didn’t exactly fit the storyline or mood very well. I liked it so much though, and I had a hard time getting rid of it, that I decided to turn it into a short film instead, as a sort of introduction into the world which this story takes place.

Since at the time of filming, I was still considering myself a sort of student of the art, I invite you to watch that short film for free, here on YouTube: https://youtu.be/mj4XN0OvtYc

After watching, if you liked that, subscribe and like and all that stuff youtubers are always asking for. Feel free to also leave comments, as I’d love to see your thoughts on the film.

While you’re at it, visit your favorite online bookseller and pick up a copy of my book. Any reviews you can leave on your bookseller’s website would super helpful. (As long as they’re good reviews.)

Also, if you want to stay up to date with my latest book releases, sign up for my email list. I don’t sell it to anyone, it’s just for you and me to keep in touch. Thanks you again!

Filed Under: Blog

So, you’re a student of film, or like me, you’re a story enthusiast who is doing your own unaccredited version of film school, and the big elephant in the room is telling you that you actually need to start making a film.

Now, you might be super ambitious and think about making a full movie, however, if you think about how much experience and practical knowledge you actually have, along with how much money you can spend, you’ll quickly realize that a short film is the way to start.

But where to start?

In this article, I’m going to break down my short film: “Why Of Why Didn’t I Take The Blue Pill”.

Lets see if you can learn from my experience, and get you ready for your own project.

Why Of Why Didn’t I Take The Blue Pill

When you’re first starting out, you can read all the books in the world. Check out some of my other articles, and I’ll share with you some of the books that I recommend reading. But at a certain point, you need to put your book smarts into practice.

That’s what I did with my Matrix Spoof, Why Oh Why Didn’t I Take The Blue Pill. When I decided to start this project, I did so with a specific goal in mind: to make it look as much like the Matrix as I possibly could.

For me at the time, that meant I had a few goals

  1. Get the lighting to match.
  2. Don’t ruin it with bad audio.
  3. Transport the audience into your world
  4. Give them something they haven’t seen before.
  5. Learn how to greenscreen.

Naturally, I didn’t have a big budget. So like all aspiring filmmakers, I had to get scrappy. 

How To Do Pre-Production

For this short, I storyboarded everything myself. I studied clips from the movie that I wanted to emulate and printed off several pictures so that my crew would be able to understand my vision and how I wanted to light this. 

I didn’t have any fancy software, other than Final Draft and the adobe creative suite to help with everything. The storyboards were drawn by me, by hand. Then I had to create a budget.

For a budget, I know I went over it a little, but I budgeted about $1000. That might sound like a lot to you as a beginning filmmaker, and for me, it was.

Luckily I already had splurged several months before and bought a Dracast lighting kit, and a GH5s camera with a few lenses, a Senheiser boom mic, and a Zoom recorder. I’m not going to include those in my budget, but I think I ended up spending close to $5000 on those at the time. Some were second hand. Those have honestly been the staples of my gear for the last few years, and probably will continue to be, though I do add to that when I can afford to.

Anyhow, for my shoot, since I couldn’t get too spendy, I needed to tally my resources. At the time, I was working full time as a general contractor, and I had access to a vacant house with a fireplace and a garage. Location—set.

Next, I needed props. I could use the garage, but it was so bare, that I walked around my jobsite and was able to collect several wooden pallets that I turned into tables, and leaned against walls to add some variety.

After that, I needed some furnishings for inside the house. In the Matix, they had these two rich red couches. My dad’s office had 2 similar couches, so I borrowed those and an end table my wife had, and wallah, I had my interior set decorated.

There were other places I needed, like a pool, a forested tea party, and a worn-out commercial district. My parents had a pool, so that was easy enough. Their yard was also ideal for setting up my tea party scene. The run-down commercial district was a stumper. I decided to do that all with greenscreen, so that became one of my goals to learn how to do.

Up until this point, everything has been free, but now I need a greenscreen, which was actually pretty cheap on Ebay (cheap both in price and quality, though I still use it today). Then I needed some tea sets and computer parts. I went to Deseret Industries, our local 2nd hand thrift store, and found pretty much everything I could possibly want. I think I bought most all my props for about $50. Then I just had to scour my house, grabbing things like potatoes, an old science fair project from elementary school, a bunch of wires that we all have filling up one of our junk drawers, and things like that. I did have to buy some china balls, but I ordered those in from, China, for a really cheap price, I can’t remember, maybe $75 or so.

For costumes, I shopped the 2nd hand thrift store, ebay, and the Halloween store till I had what I needed. I think I spent about $100 on all of it put together.

I also needed to make a few props. I wanted breaking concrete, because that was one of the coolest things about the Matrix. So I used scrap 2×4’s, 2×2’s and ¼” sheetrock to build some breakable pillars and floors that I could film and edit into the movie. These didn’t cost a lot, because I had access to a bunch of waste from my construction sites, however the time it took to build was days.

In the end, I was ready to set up my scenes. All I needed now was crew and actors.

Since I wasn’t in an actual film school, I couldn’t just grab my buddies in class and go to work. Come to think of it, I don’t really have any buddies anymore, just my family. Oh well, I did find a guy at church who does corporate videos and some creative work for BYU. I told him about my project, and he volunteered to help me out. Sweet!

Next, I enlisted his son and some of the teenage boys from my church and I had a cheap film crew.

For actors, I found a Facebook group for filmmakers, and I put out a casting call. I had a lot of feedback from some students and freelancers who were hoping to build their portfolio. I wanted to pay them, so I offered about $200/day, if I remember right. I had them sign some legal documents that I drafted up. No, I didn’t use a lawyer, but I’ve read so many legal documents in my career, I might as well be a fake lawyer. So now I could have them sign a document to legitimize my rights to their work and in the end, I had 4 actors, 4 would show up on one day, and two the next day. That put me over budget, since I think I might have paid them a collective sum of $1200 on actors. 

I went in to the home on my construction site and set up my set the day before,  and we were good to get filming.

Day 1: Production

film a student short film

I did not sleep at all the night before. I left bright and early to arrive before anyone else. I think I stopped at McDonalds to grab a breakfast to try and calm my nerves, though I felt nauseous from the anxiety of doing this production.

As soon as everyone showed up, I had them sign their legal rights away then had them start getting dressed and in makeup. I did have to hire a single hair and makeup artist, since I’d be going pretty crazy with some of their hair. She brought her daughter along, and in the end, I was glad I had 2 of them. I made sure I paid them both, another $600 down the drain.

Filming that first day went very well. We checked off all the shots on my shot list, and we worked from 1st light to late into the night. I brought lunch for everyone, but my wife packed it, and it was very healthy, nobody wanted to eat it, so my church volunteer took everyone who wanted, out for hamburgers. I never told my wife that.

Day 2: Production Continued

Yikes, one of our actors called in sick. Time to get creative. I didn’t want to reschedule when both actors and my cheap crew were available, because that just might never happen, so I filmed all of our Morpheus character that day, and just had him reacting to our prompts. I used my hand a little to fill in for our absent actor’s hand, and in the end, we got all his parts done.

After that, I got my daughter to my parent’s pool, and we filmed her scene. After that, I excused all my volunteer crew to go home and not come back again. I also enlisted the help of my brother who loves to scuba dive. Me and him went to the bottom of the pool and used one of his underwater cameras to film a few clips there.

A week or two later, I brought my other actor back, no longer sick, and we did the whole second day’s shoot over again. We filmed him in the room, reacting to my prompts. I was a one-man crew this day, and after that, we went back to my parent’s pool, and I got my scene with him done there also.

And then I was able to breathe a sigh of relief. I had all the footage I would need, in the can… I thought.

Post Production

How long do you imagine it should take to edit that video together? A week? A month? Try 6-8 months.

I worked every night till one or two in the morning, and every Saturday, all day and night. I had no idea how much work went into cutting a movie together. 

Add to that, the fact that I just owned a simple consumer grade computer. I already had the adobe editing suite, so I had access to all the cool things it could do, though I didn’t know how to do any of it.

I also knew I’d need to do a 3d element for when my Neo character touches the mirror and the liquid mirror climbs up his body like mercury. Luckily I found Blender, and I started learning how to use that. Boy was that a big learning curve.

All the while, my computer kept crashing every hour or less because of the computing power I needed but didn’t have.

The sheer amount of masking was daunting. Not only that, but once I thought I had something masked out, I had to render it so my cheap computer could play it at realtime speed, and I learned how badly a mask can jitter if not done perfectly. 

Great, back to masking everything all over again. I couldn’t work in layers, because my computer was too weak, so I rendered every layer with its transparent alpha, and overlaid it on the backgrounds, and in the end, everything I did had to be in a destructive workflow.

Some things ended up looking great, some looked terrible, and by month 6 I was burned out. I think like many film projects, I eventually finished this one by giving up, rather than redoing work for the umpteenth time.

I calculated my time to edit this, and arrived at the conclusion that I spent about 4 hours per every 1 second of finished film produced. Figure that and give me a dollar value for your time. Yikes.

What We Learn

Well it was done. I was proud of it, mostly. Still I knew the production quality wasn’t at all near film festival quality. So I posted it on Youtube for all to enjoy.

So here are my key take-aways on my goals and things I learned, and hopefully you can learn too:

  1. On Lighting:
    1. Having examples of what you want for lighting on set really helped me get the look I was going for. I had disagreements with my helpers on how to light something, but when I showed them the picture of my vision, it clicked, and we got the lighting we needed.
    2. LED Christmas lights might flicker on your set. Mine did, because the frequency of the electricity lighting them, was out of sync with my shutter speed. I had florescent light bulbs in my china balls, and those retained their light better, because the plasma didn’t die fast enough for the electrical frequency to be an issue.
    3. If you need a film light in a specific spot, but can’t get it out of frame in camera, pretend it’s a practical.
    4. The Sun is terrible at lighting a greenscreen outdoors, especially if you don’t have any lights to overpower the Sun.
  2. On Audio:
    1. Go through the motions of calling out audio and camera before calling action. It’s so easy to remember to push record on one but not the other.
    2. Get backup audio if possible, just in case. I wish I could have had another microphone to catch some of the secondary actor’s audio that just wasn’t possible on the scene. It made me have to use ambient audio and it was very obvious.
    3. Whatever you think you need to reduce reverb in your scene, do more. It’s near impossible to cut out the echoes in a room with a lot of tight smooth surfaces.
  3. On Transporting the audience:
    1. Some things I had to do in post and with greenscreens. This is possible, but difficult and much more time consuming. I had fake sconces that I added to the walls in post, and fake backgrounds that weren’t all that convincing. If you film something practically, then do it. Even if it costs a little extra, it will give you a much better production value in the end.
  4. On giving the audience something they haven’t seen:
    1. I think as an entertainer, it’s our job to create a sense of wonder in our audience. I guess, in the end, I’m too close to this project to know if I succeeded in this. I’ll have to look at audience reaction to know that.
  5. On learning Greenscreen:
    1. Chroma keying is a lot harder than I thought it would be. Even with a decently lit greenscreen, there was a lot of issues I ran into. Reflections that I never knew were there kept giving me grief. Even on shots that I had a decent greenscreen lit, I found that I still had to do a surprising amount of masking to cut it out.
  6. Other key take aways:
    1. Be flexible. When my actor called in sick, I had to completely change my whole shooting plan.
    2. Get a current picture of your actors before they show up. When I hired my Neo character on Facebook, his picture showed him clean shaven. When he showed up on set, he had a full beard and mustache. Yikes, that wasn’t in the plan. Not only did it not fit with my vision of a Neo character, but I didn’t know how I was to make my 3d model of his face for the mercury to climb with facial hair. Luckily I got through it, but it was still unexpected.
    3. People are the most expensive part of a film project. I felt that I was pretty scrappy with my scenes and props, but people, despite my volunteer crew, was where I went over budget.
    4. Don’t forget B-roll. While I got all my storyboard shots, I didn’t get nearly enough b-roll. In the end, I had to film some of this during my edit so I’d have enough to cut in when nothing else would fit.
    5. Get coverage. Another problem with filming nothing but storyboard shots, is that sometimes it doesn’t cut together very well. I sure could have used some additional shots to make everything flow better in the edit.
    6. Know your backgrounds before you shoot your actors. In my composite at the end, with the tea party, I shot my actors walking along, but I filmed them from the wrong angle, and so they don’t match my tea party scene that I built later. If you’ll notice, they tend to glide sideways as they walk. Not very good looking.
    7. The more special/visual effects you do, the longer the edit will take. Especially if you have a bad computer.
    8. Invest in a good computer. I built my own after this because there was no way I was going to fight another short film on my family’s consumer grade computer. Never, never, never again.

In the end, I went over budget by close to $800. Not ideal, but I had no idea before this how much this was likely to cost. My next short I think I’ll be a little more prepared on what things are likely to cost.

I’m sure as you watch, you might think of a couple other things I could have done better. If you haven’t seen the video, then check it out. Also, check out my breakdown online and leave any comments you thought about as you watched it.

I hope this helps you get a better jump on your future project.

To watch the actual short film, you can view it here: https://youtu.be/JcToyRGe7v0

For my making of video, check it out here: https://youtu.be/jRDd24lIbmE

Filed Under: Blog

By Leslie Zimmerman

An illustrated ABC (alphabet) book

ISBN: 978-1-943239-12-2

No longer for sale. To obtain a copy, email me at Brent@lightmindedarts.com

Filed Under: Books

By Leslie Zimmerman

The children of military personnel face the trauma and anxiety of separation due to deployments. Parents are often not equipped with the knowledge or tools that they need to provide comfort through these challenging times. In an easy to understand and entertaining format, this book opens the conversation about deployments. Parents will be able to give children an understanding of what is occurring and empower them to continue to grow and learn and develop their own inner strength and coping strategies.

ISBN: 978-1-943239-10-8

ISBN: 978-1-943239-09-2No longer for sale. To obtain a copy, email me at Brent@lightmindedarts.com

Filed Under: Books

By Leslie Zimmerman

Tim the turtle is asked what he would like to be when he grows up. This children’s book is full of cute illustrations and helps kids learn that a world of possibilities is open to them.

ISBN: 978-1-943239-06-1No longer for sale. To obtain a copy, email me at Brent@lightmindedarts.com

Filed Under: Books

One day, Tim the turtle was asked what he would like to be when he grows up.

Join this adorable shelled friend as he explores the possibilities of his future.

“This a wonderful book! I love the flowing text and charming illustrations! It’s one of those fun stories that opens up the imagination and transports you to a world where anything is possible!” – Pinklady 

“Dream Big by Leslie Zimmerman is a wonderful children’s picture book for the young one in your life! The storyline and illustrations are wonderful and my girls loved discussing what Tim the Turtle was on each page.” – CBC​

“Dream Big is the perfect book to help inspire kids, and it is adorable and fun as well. My 5-year-old nephew LOVES it and it makes him so happy! The illustrations are also wonderful. Recommended for every family!” – Natalie

Find this at Amazon.com
Written by Leslie Zimmerman
Illustrated by: Paige Briscoe

Filed Under: Blog

By Colette Lindstrom

This is a story about two opposite personalities. One enjoys relaxing, and doesn’t see himself as very special. The other is active and egotistical. They begin as enemies, but come to find that their differences compliment each other.

ISBN: 978-1-943239-13-9

Available at Amazon

Filed Under: Amazon, Books

By Colette Lindstrom

Millie Moo is a children’s picture book about a toddler whose first word, becomes the only word she ever wants to say.  Her parents are excited about the new word at first, but then become very stressed and make every attempt to expand her vocabulary.

ISBN: 978-1-943239-11-5

Available at Amazon

Filed Under: Amazon, Books

  • « Previous Page
  • 1
  • …
  • 5
  • 6
  • 7
  • 8
  • 9
  • Next Page »

Recent Posts

  • When Talent Isn’t Enough: What Ruth Douthitt Taught Me About Surviving as a Creative
  • When Your Dream Dies and You Still Win
  • Realizing Your Art Isn’t A Sin
  • Finding Joy In Writing, Accepting The Slow Burn – With Kern Carter
  • Creatives Need Time

About Me

The art of storytelling has always fascinated me. When I think back and imagine a world before modern media, I imagine a parent entertaining their kids around the hearth with fantastic tales true and/or whimsical. Never mind the accuracy of this vision, it’s the way I choose to think of it. It’s also the inspiration for my work, to tell stories that captivate, stories that the whole family can enjoy together.

Contact Us

Menu

  • B-Roll
  • Books
  • Videos
  • About
  • Contact

Recent Posts

  • When Talent Isn’t Enough: What Ruth Douthitt Taught Me About Surviving as a Creative
  • When Your Dream Dies and You Still Win
  • Realizing Your Art Isn’t A Sin
  • Finding Joy In Writing, Accepting The Slow Burn – With Kern Carter
  • Creatives Need Time

Blog Updates


  • YouTube

Copyright © 2025. All Rights Reserved. Light Minded Arts

2026

Light Minded Arts

All Rights Reserved

Site by PDM